Introduction
In the intricate world of modern software, securing access to resources is paramount. Authentication and authorization systems form the bedrock of this security, determining who a user or system is, and what they are permitted to do. Far beyond simple username-password checks, today’s systems are distributed, resilient, and designed to protect against a myriad of sophisticated attacks.
Understanding the internal mechanics of these systems is no longer a niche skill but a fundamental requirement for every software engineer. From designing robust APIs to building secure front-end applications, a deep comprehension of authentication tokens, secure storage, authorization flows, and advanced defense mechanisms is critical to prevent vulnerabilities that could lead to data breaches, unauthorized access, and reputational damage.
This guide will demystify the complex landscape of modern authentication and security systems as of 2026. We will explore the internal workings of key components like authentication tokens, OAuth2, OpenID Connect, various protection mechanisms, and the overarching zero-trust model. By the end, you will possess a framework-agnostic mental model for designing, implementing, and securing authentication architectures in real-world production environments.
The Problem It Solves
Historically, securing access was often rudimentary: a username and a password stored directly in a database. This approach quickly proved inadequate as applications grew in complexity, distributed across multiple services, and exposed to the internet. The core challenges that modern authentication and security systems address include:
- Identity Verification at Scale: How do we reliably confirm a user’s identity across multiple applications and services without constantly re-authenticating them?
- Granular Authorization: Beyond “who are you,” how do we determine “what can you do” with fine-grained control over resources, and delegate access securely?
- Distributed Trust: In microservice architectures, how do services trust requests coming from other services, and how do they verify user identity without direct access to a central user database?
- Protection Against Common Attacks: How do we defend against credential stuffing, brute-force attacks, Cross-Site Scripting (XSS), Cross-Site Request Forgery (CSRF), replay attacks, and other web vulnerabilities?
- User Experience: How do we provide a seamless and secure experience, including Single Sign-On (SSO), while maintaining strong security postures?
- Evolving Threat Landscape: As attackers become more sophisticated, how do we build systems that are adaptable and resilient to new attack vectors?
The core problem statement is to establish, maintain, and verify trust in a distributed, hostile, and continuously evolving digital environment, ensuring that only authorized entities can access sensitive resources, all while providing a good user experience.
High-Level Architecture
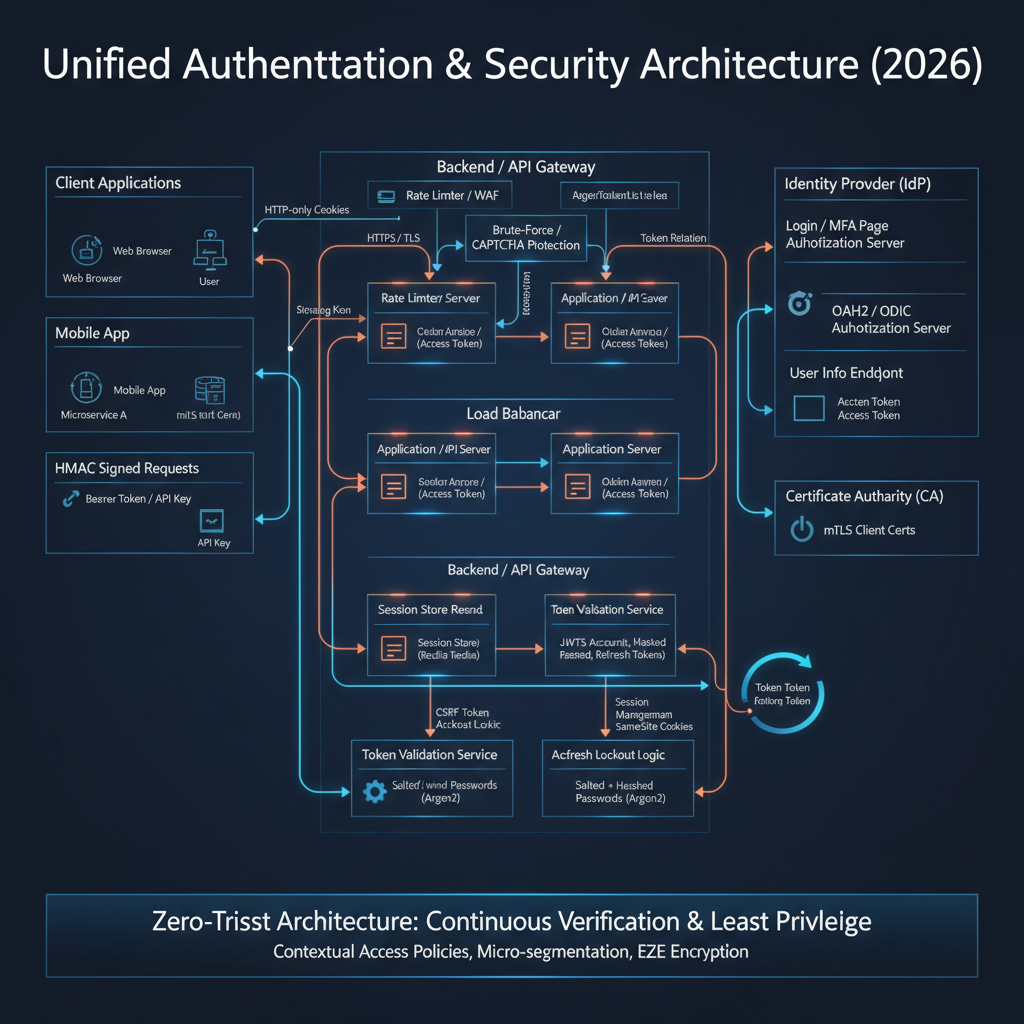
A modern authentication and security system typically involves several key components working in concert. The user interacts with a client application, which in turn communicates with an authentication server to verify identity and obtain access credentials. These credentials are then used to interact with various resource servers, often in a distributed microservice architecture.
Component Overview:
- End User: The human or machine initiating an action.
- Client Application: The software interface (web browser, mobile app, desktop app, CLI tool) that the user interacts with.
- Authentication Server (Auth Server): A dedicated service responsible for verifying user identities, managing sessions, and issuing authentication and authorization tokens. It often includes features for password hashing, brute-force protection, and Multi-Factor Authentication (MFA). Also known as an Identity Provider (IdP) in some contexts.
- Identity Store: A database or directory service (e.g., LDAP, Active Directory, a custom SQL DB) that stores user profiles and metadata.
- Credential Database: Stores hashed user passwords and other authentication secrets.
- Resource Server (API): An application or service that hosts protected resources (data, functionality) and requires valid authentication/authorization tokens to grant access.
- Data Store: The underlying database or storage system that holds the actual application data.
- Other Client Application: Another application that can leverage Single Sign-On (SSO) through the same Authentication Server.
Data Flow:
- The User interacts with the Client Application.
- The Client Application initiates an authentication request to the Auth Server.
- The Auth Server verifies the user’s identity against the Identity Store and Credential Database. This involves password hashing and brute-force protection.
- Upon successful authentication, the Auth Server issues authentication and authorization tokens (e.g., Access Token, ID Token, Refresh Token) back to the Client Application.
- The Client Application then includes the Access Token in requests to Resource Servers.
- Each Resource Server validates the received Access Token with the Auth Server (or by self-validating if it’s a JWT).
- Based on the token’s validity and embedded permissions, the Resource Server accesses necessary data from its Data Store.
- The Resource Server returns the requested data to the Client Application.
- Refresh Tokens are used by the Client Application to obtain new Access Tokens when the current one expires, without requiring the user to re-authenticate.
- Single Sign-On (SSO) allows the User to access Other Client Applications after authenticating once with the Auth Server.
Key Concepts:
- Statelessness: Many modern systems aim for statelessness on the resource server side by using self-contained tokens (like JWTs), offloading session management to the client or the authentication server.
- Separation of Concerns: Authentication (who you are) is distinct from Authorization (what you can do), handled by different parts of the system, though often coordinated by the Auth Server.
- Defense in Depth: Multiple layers of security mechanisms (hashing, tokens, cookies, anti-CSRF, anti-XSS, mTLS, zero-trust) are employed to protect against various attack vectors.
How It Works: Step-by-Step Breakdown
Let’s trace a common flow: a user logging into a web application using OAuth2 and OpenID Connect, and then accessing a protected API.
Step 1: User Initiates Login and Authorization Request
Problem Solved: How does a client application securely initiate a user’s authentication and request permission to access specific resources on their behalf?
Internal Mechanics: The client application redirects the user’s browser to the Authorization Endpoint of the Authentication Server. This redirection includes specific parameters that define the requested scope of access and security measures.
Typical Request Flow:
- Client-Side Action: The user clicks a “Login” button on the client application (e.g.,
https://myclientapp.com). - Redirect to Auth Server: The client application constructs an OAuth2 Authorization Request and redirects the user’s browser to the Auth Server’s Authorization Endpoint.
GET https://auth.example.com/oauth2/authorize ?response_type=code &client_id=myclientid123 &redirect_uri=https://myclientapp.com/auth/callback &scope=openid%20profile%20email%20api.read &state=random_csrf_string &code_challenge=PKCE_challenge_string &code_challenge_method=S256response_type=code: Indicates the client wants an authorization code (PKCE flow).client_id: Identifies the client application.redirect_uri: Where the Auth Server should send the user back after authentication.scope: Defines the permissions requested (e.g.,openidfor OIDC,profile,email, custom API scopes).state: A randomly generated string used to prevent CSRF attacks (covered later).code_challengeandcode_challenge_method: Part of Proof Key for Code Exchange (PKCE) to prevent authorization code interception attacks.
Common Security Risks:
- Open Redirect: If
redirect_uriis not strictly validated by the Auth Server, an attacker could redirect the user to a malicious site. - CSRF (State Parameter): Without a
stateparameter, an attacker could trick a user into initiating an auth flow, then hijack the response. - Authorization Code Interception (PKCE): Without PKCE, if the authorization code is intercepted, it could be used by an attacker.
Best Practices:
- Always register
redirect_uris with the Auth Server and enforce strict matching. - Generate a strong, unpredictable
stateparameter for each request and validate it upon callback. - Always use PKCE for public clients (single-page apps, mobile apps).
Step 2: User Authentication and Consent
Problem Solved: How does the Authentication Server verify the user’s identity securely and obtain user consent for the requested permissions?
Internal Mechanics: The Auth Server presents a login page to the user. It then processes the user’s credentials using robust hashing and brute-force protection. If successful, it checks the requested scopes and asks the user for consent.
Typical Request Flow:
- Login Page Display: The Auth Server (e.g.,
auth.example.com) displays its login page to the user’s browser. - User Enters Credentials: User submits their username and password.
- Credential Verification:
- The Auth Server receives the credentials.
- It retrieves the stored hashed password and salt for the given username from the
Credential Database. - It hashes the provided password with the retrieved salt using a slow, memory-hard hashing algorithm (e.g., Argon2, bcrypt).
- It compares the newly generated hash with the stored hash.
- Brute-Force Protection: If the login fails, the Auth Server increments a failed login counter for that user/IP address. If the count exceeds a threshold, it might introduce delays, display a CAPTCHA, or temporarily lock the account.
- CAPTCHA Protection: If suspicious activity is detected, a CAPTCHA (Completely Automated Public Turing test to tell Computers and Humans Apart) is presented to ensure the request originates from a human.
- Account Lockout: After multiple failed attempts, the user’s account is temporarily or permanently locked to prevent further brute-force attempts.
- Consent Screen (Optional but Recommended): If the requested
scopeincludes new or sensitive permissions, the Auth Server presents a consent screen, asking the user to approve the client application’s access to their data. - Authorization Code Issuance: Upon successful authentication and consent, the Auth Server generates a short-lived, single-use Authorization Code.
- Redirect to Client: The Auth Server redirects the user’s browser back to the
redirect_uriprovided by the client, appending the authorization code and the originalstateparameter.GET https://myclientapp.com/auth/callback ?code=AUTH_CODE_XYZ &state=random_csrf_string
Common Security Risks:
- Weak Password Hashing: Using fast, unsalted hashing algorithms.
- No Brute-Force Protection: Allowing unlimited login attempts.
- Phishing: Attackers can create fake login pages. MFA helps mitigate this.
- Session Fixation: If the Auth Server issues a session cookie before authentication and doesn’t rotate it, an attacker could fixate it.
Best Practices:
- Use modern, memory-hard password hashing algorithms like Argon2 or bcrypt with sufficient work factors.
- Implement robust brute-force protection, including rate limiting, CAPTCHAs, and account lockouts.
- Always use HTTPS for all communication.
- Implement MFA (Multi-Factor Authentication) to add an extra layer of security.
Step 3: Client Exchanges Authorization Code for Tokens
Problem Solved: How does the client securely obtain concrete authentication and authorization tokens that can be used to access resources?
Internal Mechanics: The client application, now having the authorization code, makes a direct, server-to-server (or client-to-server for public clients) POST request to the Auth Server’s Token Endpoint. This request includes the authorization code and client credentials (if applicable) and, crucially, the PKCE code verifier.
Typical Request Flow:
Client Receives Code: The client application’s callback handler (at
https://myclientapp.com/auth/callback) extracts thecodeandstateparameters from the URL.State Validation: The client validates the received
stateparameter against the one it generated in Step 1. If they don’t match, it’s a CSRF attack, and the request is aborted.Token Exchange Request: The client makes a POST request to the Auth Server’s Token Endpoint. This request is typically made from the backend for confidential clients or directly from the frontend for public clients using PKCE.
POST https://auth.example.com/oauth2/token Content-Type: application/x-www-form-urlencoded grant_type=authorization_code &code=AUTH_CODE_XYZ &redirect_uri=https://myclientapp.com/auth/callback &client_id=myclientid123 &code_verifier=PKCE_verifier_string // ONLY for PKCE flows &client_secret=myclientsecret // For confidential clients onlygrant_type=authorization_code: Specifies the type of grant.code: The authorization code received in Step 2.code_verifier: The cryptographically random string generated by the client in Step 1 and hashed forcode_challenge. The Auth Server hashes thiscode_verifierand compares it to thecode_challengeit received earlier.client_secret: For confidential clients (e.g., server-side applications), this proves the client’s identity. Public clients (SPAs, mobile apps) do not use a client secret, relying solely on PKCE.
Auth Server Validates: The Auth Server verifies the
code,redirect_uri,client_id,client_secret(if present), and thecode_verifier. If everything matches, it invalidates the authorization code (it’s single-use).Token Issuance: The Auth Server issues the following tokens:
- Access Token (JWT): A short-lived token used to access protected resources. It contains claims (user ID, roles, scopes) and is cryptographically signed.
- ID Token (JWT): (Only with OpenID Connect) Contains identity claims about the authenticated user (e.g., name, email, picture). It is also signed.
- Refresh Token: A long-lived token used to obtain new Access Tokens when the current one expires, without requiring the user to re-authenticate.
expires_in: The lifetime of the Access Token in seconds.
{
  "access_token": "eyJhbGciOiJIUzI1Ni...",
  "token_type": "Bearer",
  "expires_in": 3600,
  "refresh_token": "refresh_token_abc",
  "id_token": "eyJhbGciOiJIUzI1Ni..."
}
Common Security Risks:
- Authorization Code Interception (Without PKCE): If an attacker intercepts the
codeand quickly exchanges it before the legitimate client, they gain access. PKCE prevents this by requiring thecode_verifier. - Client Secret Leakage: For confidential clients, if the
client_secretis compromised, an attacker could impersonate the client.
Best Practices:
- Always use PKCE for public clients.
- Store
client_secrets securely (e.g., environment variables, secret management services) for confidential clients. Never embed them in client-side code. - Enforce a short lifetime for Access Tokens.
- Ensure the Token Endpoint is strictly protected with HTTPS.
Step 4: Client Stores Tokens Securely
Problem Solved: Where and how should the client application store the received tokens (Access, ID, Refresh) to prevent theft and misuse by malicious scripts or attackers?
Internal Mechanics: The choice of storage depends heavily on the client type (web, mobile, desktop) and the type of token. For web applications, the primary choices are HTTP-only cookies, localStorage, or sessionStorage. Each has different security implications.
Typical Storage Decisions:
Access Token:
- HTTP-only, Secure, SameSite Cookie: Best for preventing XSS. The browser automatically sends it with every request to the domain. JavaScript cannot access it.
localStorageorsessionStorage: Vulnerable to XSS attacks, as any malicious script injected into the page can read these. Not recommended for sensitive tokens.- In-memory (SPA with backend): If the SPA’s backend acts as a confidential client, it might store the Access Token in memory for short-term use after receiving it from the Auth Server, and then proxy requests.
Refresh Token:
- HTTP-only, Secure, SameSite Cookie: Strongly recommended for web applications. Typically, this cookie would be scoped to the Auth Server’s domain or a dedicated token refresh endpoint, not the resource server’s domain, to limit exposure.
- In-memory (SPA with backend): Similar to Access Token, if a backend is involved.
- Mobile/Desktop Apps: Secure storage mechanisms provided by the OS (e.g., iOS Keychain, Android Keystore, Windows Credential Manager).
ID Token:
- Used for identity information. Its primary purpose is to be validated upon receipt by the client to confirm the user’s identity.
- The claims within it can be used for display purposes (e.g., “Welcome, John Doe”).
- Should generally not be stored long-term for authorization. If stored, treat its security with the same rigor as an Access Token.
SameSite and Secure Cookies:
Secureattribute: Ensures the cookie is only sent over HTTPS connections, protecting against eavesdropping.HttpOnlyattribute: Prevents client-side JavaScript from accessing the cookie, mitigating XSS attacks.SameSiteattribute: Controls when cookies are sent with cross-site requests.Lax: Cookies are sent with top-level navigations and GET requests initiated by third-party sites.Strict: Cookies are only sent for same-site requests (same domain).None: Cookies are sent with all requests, including cross-site, but requires theSecureattribute.SameSite=Noneis often used for cross-site SSO scenarios, but care must be taken.
Common Security Risks:
- XSS (Cross-Site Scripting): If tokens are stored in
localStorageorsessionStorage, an XSS vulnerability allows an attacker to steal them. HTTP-only cookies mitigate this. - CSRF (Cross-Site Request Forgery): If tokens are stored in cookies without proper anti-CSRF measures (like
SameSite=Lax/Strictor anti-CSRF tokens), an attacker can trick the user’s browser into sending authenticated requests. - Insecure Mobile Storage: Improper use of mobile OS secure storage.
Best Practices:
- For web applications, store Access Tokens and Refresh Tokens in
HttpOnly,Secure,SameSite=LaxorStrictcookies. - If
SameSite=Noneis required for cross-site functionality (e.g., SSO), ensure robust anti-CSRF tokens are also in place. - Never store sensitive tokens in
localStorageorsessionStorage. - For mobile/desktop, use OS-provided secure storage.
- Encrypt tokens at rest if stored on disk.
Step 5: Client Accesses Protected Resources
Problem Solved: How does the client application use the obtained Access Token to securely call protected APIs and how do resource servers verify these requests?
Internal Mechanics: The client includes the Access Token in the Authorization header of its HTTP requests to resource servers. The resource server then validates this token, typically by verifying its signature and claims, before granting access.
Typical Request Flow:
- Client Makes API Request: The client application wants to fetch user data from a protected API endpoint. It retrieves the Access Token.
- Attach Access Token: The client adds the Access Token to the
Authorizationheader using theBearerscheme.GET https://api.example.com/profile/me Authorization: Bearer eyJhbGciOiJIUzI1NiIsInR5cCI6IkpXVCJ9.eyJzdWIiOiIxMjM0NTY3ODkwIiwibmFtZSI6IkpvaG4gRG9lIiwiaWF0IjoxNTE2MjM5MDIyfQ.SflKxwRJSMeKKF2QT4fwpMeJf36POk6yJV_adQssw5c - Resource Server Receives Request: The API Gateway or Resource Server receives the request.
- Token Validation: The Resource Server performs token validation:
- Signature Verification: If it’s a JWT, it verifies the token’s signature using the public key of the Auth Server (for asymmetric algorithms like RS256) or the shared secret (for symmetric algorithms like HS256). This ensures the token hasn’t been tampered with.
- Expiration Check: It checks the
exp(expiration) claim to ensure the token is still valid. - Audience Check: It checks the
aud(audience) claim to ensure the token was intended for this specific resource server. - Issuer Check: It checks the
iss(issuer) claim to ensure the token came from the expected Auth Server. - Scope/Permissions Check: It inspects the
scopeorrolesclaims to determine if the authenticated user has permission to access the requested resource. - Revocation Check (Optional): For stateless tokens, revocation is complex. If a token needs to be revoked before its natural expiry (e.g., user logs out, password change), the resource server might consult a revocation list or a caching service maintained by the Auth Server.
- Authorization Decision: If the token is valid and authorized, the Resource Server proceeds to fulfill the request.
- Return Response: The Resource Server returns the requested data to the client.
API Keys and Signed URLs:
- API Keys:
- Problem: Machine-to-machine authentication or simple client identification where a full OAuth2 flow is overkill.
- How it works: A static, secret string unique to a client application or service. It’s typically passed in a custom HTTP header (e.g.,
X-API-Key) or as a query parameter. - Security Risks: Can be easily leaked if not handled carefully. No inherent expiration or scope.
- Best Practices: Treat as secrets, rotate regularly, use HTTPS, restrict IP access, and rate limit.
- Signed URLs:
- Problem: Granting temporary, time-limited access to specific private resources (e.g., a private S3 object) without requiring full authentication.
- How it works: A URL is generated by a trusted server, including query parameters for expiry time, resource path, and a cryptographic signature (HMAC) of these parameters. Anyone with the URL can access the resource until it expires.
- Security Risks: If the signing key is compromised, attackers can generate valid signed URLs. If the expiry is too long, the window of vulnerability increases.
- Best Practices: Use short expiry times, strong signing keys, and ensure the signing process is secure.
HMAC Authentication and Request Signing:
- Problem: Ensuring the integrity and authenticity of an entire HTTP request, especially in machine-to-machine communication, to prevent tampering and replay attacks.
- How it works:
- The client generates a canonical representation of the request (method, path, headers, body, timestamp).
- It calculates an HMAC (Hash-based Message Authentication Code) of this canonical string using a shared secret key.
- The HMAC and potentially the timestamp are sent in a custom
Authorizationheader. - The server receives the request, rebuilds the canonical string, recalculates the HMAC using its copy of the shared secret, and compares it to the client’s HMAC.
- The server also checks the timestamp to prevent replay attacks (requests older than a certain threshold are rejected).
- Security Risks: Shared secret key compromise. Clock skew between client and server affecting timestamp validation.
- Best Practices: Use strong, unique shared secrets. Implement strict timestamp validation and replay protection. Rotate keys regularly.
Mutual TLS Authentication (mTLS):
- Problem: Providing strong, bidirectional authentication at the network layer for machine-to-machine communication, ensuring both client and server verify each other’s identity.
- How it works:
- The client initiates a TLS handshake with the server.
- The server presents its certificate to the client (standard TLS).
- Crucially, the server requests a client certificate.
- The client presents its certificate to the server.
- Both client and server validate each other’s certificates against trusted Certificate Authorities (CAs).
- If both validations succeed, a secure, mutually authenticated TLS connection is established.
- Security Risks: Compromised client certificates. Misconfigured trust stores.
- Best Practices: Use a robust Public Key Infrastructure (PKI) for certificate issuance and management. Implement certificate revocation lists (CRLs) or Online Certificate Status Protocol (OCSP) to check for revoked certificates. Restrict access to client certificates.
Common Security Risks (General):
- Token Leakage: If the Access Token is exposed (e.g., through insecure logging, network sniffing without HTTPS).
- Replay Attacks: If the Access Token is intercepted and reused (though short-lived JWTs mitigate this).
- Insecure API Endpoints: APIs not properly validating tokens or having authorization flaws.
Best Practices:
- Always use HTTPS for all API communication.
- Resource servers should implement robust token validation, including signature, expiry, audience, and issuer checks.
- Implement granular authorization checks based on token claims.
- Cache public keys for JWT validation to reduce latency, but refresh them periodically.
- Consider an API Gateway for centralized token validation and policy enforcement.
Step 6: Token Refresh and Rotation
Problem Solved: How can a user maintain an authenticated session and obtain new access tokens without having to re-enter their credentials every time a short-lived access token expires? How do we mitigate the risk of long-lived tokens being compromised?
Internal Mechanics: The Refresh Token, a long-lived credential, is used to request a new Access Token and potentially a new Refresh Token from the Auth Server’s Token Endpoint. Token rotation involves issuing a new Refresh Token with each refresh request, invalidating the old one.
Typical Request Flow:
- Access Token Expiry: The client application makes an API request, but the Resource Server rejects it with a
401 Unauthorizedor403 Forbiddenstatus, indicating the Access Token has expired or is invalid. - Client Uses Refresh Token: The client retrieves its stored Refresh Token (e.g., from an HTTP-only cookie).
- Refresh Request: The client makes a POST request to the Auth Server’s Token Endpoint using the
refresh_tokengrant type.POST https://auth.example.com/oauth2/token Content-Type: application/x-www-form-urlencoded grant_type=refresh_token &refresh_token=refresh_token_abc &client_id=myclientid123 &client_secret=myclientsecret // For confidential clients - Auth Server Validates Refresh Token:
- The Auth Server validates the Refresh Token (e.g., checks if it’s valid, not revoked, not expired).
- Token Rotation: If token rotation is enabled, the Auth Server invalidates the
refresh_token_abcthat was just used.
- Issue New Tokens: If valid, the Auth Server issues a new Access Token and a new Refresh Token (for token rotation).
{ "access_token": "eyJhbGciOiJIUzI1Ni...", "token_type": "Bearer", "expires_in": 3600, "refresh_token": "new_refresh_token_xyz" } - Client Stores New Tokens: The client updates its stored Access Token and Refresh Token with the newly issued ones.
- Retry Original Request: The client retries the original API request with the new Access Token.
Common Security Risks:
- Refresh Token Leakage: If a Refresh Token is compromised, an attacker can continuously obtain new Access Tokens. Token rotation helps mitigate this.
- No Refresh Token Rotation: If Refresh Tokens are not rotated, a stolen Refresh Token remains valid indefinitely until its expiry, even if used by an attacker.
- Excessively Long Refresh Token Lifetimes: Increases the window of vulnerability.
Best Practices:
- Implement Refresh Token Rotation: Issue a new Refresh Token with each refresh request and immediately invalidate the old one. This makes stolen Refresh Tokens single-use.
- Store Refresh Tokens in
HttpOnly,Secure,SameSitecookies for web applications. - Assign reasonable (but not excessive) lifetimes to Refresh Tokens.
- Implement refresh token revocation mechanisms (e.g., on user logout, password change, suspicious activity).
- Monitor refresh token usage for anomalies.
Step 7: Session Management and Single Sign-On (SSO)
Problem Solved: How do we maintain a user’s authenticated state across multiple requests and applications, providing a seamless experience while ensuring security?
Internal Mechanics:
- Session Management: Can be server-side (where the server stores session data and issues a session ID in a cookie) or client-side (token-based, where all session state is in the token). Modern systems often combine both.
- Single Sign-On (SSO): A mechanism where a user logs in once to an Identity Provider (IdP) and gains access to multiple Service Providers (SPs) without re-authenticating. This typically leverages cookies and redirects.
Typical Flow:
Server-Side Session Management (Traditional):
- User logs in.
- Server creates a session record, stores it in a database/cache, and generates a unique session ID.
- Server sends an
HttpOnly,Secure,SameSitecookie containing the session ID to the client. - Client sends this cookie with every subsequent request.
- Server looks up the session ID, retrieves session data, and validates the session.
Token-Based Session Management (Stateless):
- User logs in, gets JWTs.
- Client stores JWTs (Access and Refresh) as described in Step 4.
- Access Tokens are used for authorization; Refresh Tokens for session persistence.
- The “session” state is primarily contained within the tokens themselves.
Single Sign-On (SSO) using OpenID Connect:
- User Accesses SP1: User tries to access
app1.com. - SP1 Redirects to IdP:
app1.comredirects the user to the IdP (Auth Server) for login.GET https://auth.example.com/oauth2/authorize?client_id=sp1... - IdP Checks Session: The IdP checks if the user already has an active session (e.g., via an IdP-specific session cookie).
- If session exists: The IdP immediately issues an Authorization Code to
app1.comwithout prompting for login. - If no session: The IdP prompts the user to log in (as in Step 2). After successful login, the IdP establishes its own session cookie.
- If session exists: The IdP immediately issues an Authorization Code to
- SP1 Exchanges Code:
app1.comexchanges the Authorization Code for tokens (Access Token, ID Token). - User Accesses SP2: User then tries to access
app2.com. - SP2 Redirects to IdP:
app2.comredirects the user to the same IdP for login. - IdP Reuses Session: The IdP finds the existing session cookie, confirms the user is already authenticated, and immediately issues an Authorization Code to
app2.com. - SP2 Exchanges Code:
app2.comexchanges the code for its own tokens. Result: User logged in once, gained access to bothapp1.comandapp2.comwithout re-entering credentials forapp2.com.
Common Security Risks:
- Session Hijacking: If session cookies are not
HttpOnlyorSecure, they can be stolen. - Session Fixation: An attacker sets a session ID before the user logs in, then the user authenticates with that ID.
- Cross-Site Cookie Leakage:
SameSite=Nonecookies used for SSO can be vulnerable if not combined with robust anti-CSRF. - IdP Compromise: If the IdP is compromised, it can affect all connected SPs.
Best Practices:
- For server-side sessions, use strong, random session IDs.
- Always use
HttpOnly,Secure,SameSite=LaxorStrictcookies for session IDs. - Rotate session IDs after login to prevent session fixation.
- Implement session timeouts (idle and absolute).
- For SSO, carefully manage
SameSite=Nonecookies and ensure robust anti-CSRF measures on all SPs. - Ensure the IdP itself is highly secure and resilient.
Step 8: Zero-Trust Authentication Models
Problem Solved: How do we move beyond perimeter-based security, where trust is implicitly granted once inside a network, to a model where every request, regardless of origin, is explicitly verified?
Internal Mechanics: Zero-Trust operates on the principle “never trust, always verify.” It requires continuous authentication and authorization for every access request to every resource, leveraging fine-grained policies and contextual information.
Typical Flow (Conceptual):
- Identity Verification: A user or service attempts to access a resource. Their identity is verified using strong authentication (MFA, certificates, biometrics). This involves the Auth Server.
- Device Posture Check: The system verifies the health and compliance of the device making the request (e.g., up-to-date OS, antivirus, encryption enabled). This might involve a Device Trust Agent or Endpoint Detection and Response (EDR) solution.
- Contextual Authorization: Based on the user’s identity, device posture, location, time of day, sensitivity of the resource, and other contextual factors, a Policy Enforcement Point (PEP) makes an authorization decision. This is often driven by a Policy Decision Point (PDP).
- Least Privilege Access: Access is granted only to the specific resource requested, with the minimum necessary permissions.
- Continuous Monitoring and Re-authentication: The session is continuously monitored for anomalous behavior. If context changes (e.g., user moves to a new location, device health degrades), re-authentication or re-authorization may be triggered.
- Micro-segmentation: Network access is segmented into small, isolated zones, limiting lateral movement for attackers.
Illustrative Request Flow with Zero-Trust:
Common Security Risks:
- Complexity: Implementing Zero-Trust can be complex, requiring integration across many systems.
- Performance Overhead: Continuous verification can introduce latency if not optimized.
- Policy Misconfiguration: Incorrect policies can lead to legitimate users being denied access or, worse, unauthorized access.
Best Practices:
- Start with a clear understanding of your assets and access patterns.
- Implement strong identity management and MFA.
- Integrate device posture assessment.
- Define granular, attribute-based access control (ABAC) policies.
- Monitor and log all access attempts and policy decisions.
- Automate policy enforcement and incident response.
Deep Dive: Internal Mechanisms
Mechanism 1: JSON Web Tokens (JWT) Structure and Verification
Problem Solved: How can authentication and authorization information be securely transmitted between parties in a self-contained, tamper-proof, and stateless manner?
Internal Mechanics: A JWT is a compact, URL-safe means of representing claims to be transferred between two parties. The claims in a JWT are encoded as a JSON object and are digitally signed.
Structure: A JWT consists of three parts, separated by dots (.):
header.payload.signature
Header: A JSON object that typically contains two fields:
alg: The algorithm used for signing the JWT (e.g.,HS256for HMAC SHA-256,RS256for RSA SHA-256).typ: The type of token, which isJWT.- Example:
{"alg": "HS256", "typ": "JWT"} - This JSON is Base64Url encoded.
Payload (Claims): A JSON object containing the actual information (claims). Claims are assertions made about an entity (typically, the user) and additional data. There are three types of claims:
- Registered Claims: Predefined claims that are not mandatory but recommended (e.g.,
iss(issuer),exp(expiration time),sub(subject),aud(audience)). - Public Claims: Custom claims defined by those using JWTs, but to avoid collisions, they should be defined in the IANA JSON Web Token Registry or be a URI that contains a collision-resistant name space.
- Private Claims: Custom claims created to share information between parties, without collision resistance.
- Example:
{"sub": "1234567890", "name": "John Doe", "iat": 1516239022, "exp": 1516242622, "aud": "api.example.com"} - This JSON is also Base64Url encoded.
- Registered Claims: Predefined claims that are not mandatory but recommended (e.g.,
Signature: Created by taking the encoded header, the encoded payload, a secret (for symmetric algorithms) or a private key (for asymmetric algorithms), and the algorithm specified in the header.
HMACSHA256(base64UrlEncode(header) + "." + base64UrlEncode(payload), secret)ForRS256, the signature is created using the private key.
Verification Process:
- The receiver (Resource Server) takes the header and payload from the JWT.
- It re-encodes them and attempts to recreate the signature using the known secret (for HS256) or the Auth Server’s public key (for RS256).
- If the recreated signature matches the signature in the JWT, the token’s integrity is verified (it hasn’t been tampered with).
- The receiver then decodes the payload and validates the claims:
exp: Is the token expired?nbf(not before): Is the token active yet?iss: Is the issuer trusted?aud: Is the token intended for this recipient?- Other custom claims as required for authorization.
Code Example (Conceptual JWT Verification):
// This is a conceptual example, real-world libraries handle cryptographic details securely.
const jose = require('jose'); // A common library for JWT operations

async function verifyJWT(token, jwksUri, audience, issuer) {
    try {
        // Fetch the JSON Web Key Set (JWKS) from the issuer
        // JWKS contains the public keys for verifying JWTs signed by the issuer.
        const JWKS = jose.createRemoteJWKSet(new URL(jwksUri));

        // Verify the JWT
        const { payload, protectedHeader } = await jose.jwtVerify(token, JWKS, {
            audience: audience,
            issuer: issuer,
            clockTolerance: 5 // Allow 5 seconds clock skew for 'exp' and 'iat'
        });

        console.log('JWT Verified:', payload);
        return payload;

    } catch (error) {
        console.error('JWT Verification Failed:', error.message);
        throw new Error('Invalid or expired token');
    }
}

// Example Usage:
// const accessToken = "eyJhbGciOiJSUzI1NiI...";
// const jwksUri = "https://auth.example.com/.well-known/jwks.json";
// const audience = "api.example.com";
// const issuer = "https://auth.example.com";
//
// verifyJWT(accessToken, jwksUri, audience, issuer)
//     .then(payload => console.log("Access granted for user:", payload.sub))
//     .catch(err => console.error("Access denied:", err.message));
Performance Implications: JWT verification is computationally inexpensive, especially if public keys are cached. This allows resource servers to be stateless, as they don’t need to consult a central session store for every request.
Mechanism 2: Advanced Password Hashing (Argon2)
Problem Solved: How can user passwords be stored securely such that even if the password database is breached, the original passwords cannot be easily recovered, and brute-force attacks against the hashes are computationally expensive?
Internal Mechanics: Password hashing transforms a password into a fixed-size string (hash) using a one-way cryptographic function. “Advanced” hashing algorithms are designed to be slow, memory-hard, and incorporate salts to resist various attacks. Argon2 is the winner of the Password Hashing Competition (PHC) and is recommended as of 2026.
Key Principles:
Salting: A unique, random string (salt) is generated for each password and combined with the password before hashing.
- Problem Solved: Prevents pre-computed rainbow table attacks (where attackers store hashes of common passwords) and ensures two identical passwords have different hashes.
- How it works:
hash = HASH_FUNC(password + salt). The salt is stored alongside the hash.
Key Derivation Functions (KDFs): Algorithms specifically designed for password hashing. They are intentionally slow and resource-intensive to make brute-forcing exponentially harder.
- Problem Solved: Resists brute-force attacks by making each hashing attempt costly in terms of CPU, memory, or time.
- How it works: KDFs like Argon2, bcrypt, and scrypt allow configuration of work factors (iterations, memory cost, parallelism) to control their computational expense.
Argon2 Internals: Argon2 has three variants:
- Argon2d: Optimized for resistance against GPU cracking attacks.
- Argon2i: Optimized for resistance against side-channel timing attacks.
- Argon2id: A hybrid version, combining the best of both. Recommended for general use.
Argon2’s parameters:
- Memory Cost (m): Amount of RAM (in KiB) used by the function. Higher
mmakes GPU/ASIC attacks harder. - Time Cost (t): Number of iterations or passes over the memory. Higher
tmakes CPU brute-force attacks harder. - Parallelism (p): Number of parallel lanes. Higher
pallows for more efficient use of multi-core CPUs during hashing but doesn’t necessarily increase security directly against a single attacker.
Hashing Process (Simplified):
- A random salt is generated.
- The password and salt are fed into the Argon2 function along with the configured
m,t,pparameters. - Argon2 performs a complex series of operations involving data-dependent memory access (making it memory-hard), multiple passes over memory (time-hard), and cryptographic permutations.
- The final output is the hash.
- The hash, salt, and parameters are stored together in a specific format (e.g.,
$argon2id$v=19$m=65536,t=3,p=1$c2FsdHN...).
Code Example (Node.js using argon2 library):
const argon2 = require('argon2');

async function hashPassword(password) {
    try {
        // Options for Argon2id (recommended)
        // m: memoryCost (KiB), t: timeCost (iterations), p: parallelism (threads)
        const hash = await argon2.hash(password, {
            type: argon2.argon2id,
            memoryCost: 65536, // 64 MB
            timeCost: 3,      // 3 iterations
            parallelism: 4    // 4 threads
        });
        console.log('Hashed Password:', hash);
        return hash;
    } catch (err) {
        console.error('Error hashing password:', err);
        throw err;
    }
}

async function verifyPassword(hash, password) {
    try {
        const match = await argon2.verify(hash, password);
        console.log('Password match:', match);
        return match;
    } catch (err) {
        console.error('Error verifying password:', err);
        return false;
    }
}

// Usage:
// (async () => {
//     const myPassword = 'MySuperSecretPassword123!';
//     const hashedPassword = await hashPassword(myPassword);
//     // Store hashedPassword in database along with the user record

//     const isCorrect = await verifyPassword(hashedPassword, myPassword); // True
//     const isIncorrect = await verifyPassword(hashedPassword, 'WrongPassword'); // False
// })();
Performance Implications: Hashing is intentionally slow. This is a security feature, not a bug. It means that while a single login verification is fast enough for a user, an attacker trying billions of hashes per second will be significantly slowed down. Parameters should be tuned to balance security and acceptable login latency (e.g., < 500ms).
Mechanism 3: OAuth2 Authorization Code Flow with PKCE
Problem Solved: How can a client application (especially a public client like a SPA or mobile app) securely obtain an Access Token on behalf of a user, without exposing client secrets or being vulnerable to authorization code interception?
Internal Mechanics: The Authorization Code Flow is the most secure and recommended OAuth2 grant type. PKCE (Proof Key for Code Exchange) adds an extra layer of security by requiring the client to prove ownership of the authorization code, even if it’s intercepted.
PKCE Steps (Deep Dive from Step 1 & 3):
Client Generates Code Verifier:
- The client (e.g., a SPA) generates a high-entropy cryptographically random string, called the
code_verifier. This string is kept secret by the client. - Example:
dBjftJeZ4CVP-mB92K27uhbUqJqYwWzP...(a long, random string)
- The client (e.g., a SPA) generates a high-entropy cryptographically random string, called the
Client Derives Code Challenge:
- The client then hashes the
code_verifierusing SHA256 and Base64Url-encodes the hash. This result is thecode_challenge. - Example:
code_challenge = Base64Url(SHA256(code_verifier)) code_challenge_method = S256(indicating SHA256 was used).
- The client then hashes the
Authorization Request (Step 1):
- The client redirects the user to the Auth Server’s Authorization Endpoint, including the
code_challengeandcode_challenge_methodin the request. - The
code_verifieritself is never sent in this step.
- The client redirects the user to the Auth Server’s Authorization Endpoint, including the
Auth Server Stores Challenge:
- The Auth Server receives the
code_challengeandcode_challenge_methodand associates them with the authorization request. - It then proceeds with user authentication and consent (Step 2).
- Upon success, it issues an Authorization Code and redirects the user back to the client.
- The Auth Server receives the
Token Exchange Request (Step 3):
- The client receives the Authorization Code.
- Now, the client makes a direct POST request to the Auth Server’s Token Endpoint. This time, it includes the Authorization Code AND the original
code_verifier.
Auth Server Validates Code Verifier:
- The Auth Server retrieves the
code_challengeit stored earlier for the given Authorization Code. - It then hashes the received
code_verifierusing thecode_challenge_method(e.g., SHA256). - It compares this newly computed hash with the
code_challengeit stored. - If they match, it confirms that the client exchanging the code is the same client that initiated the authorization request. This prevents an intercepted Authorization Code from being used by a malicious client.
- If valid, the Auth Server issues the Access Token and Refresh Token.
- The Auth Server retrieves the
Code Example (Conceptual PKCE Client-Side Logic):
// Simplified PKCE helper functions (in a real app, use a robust OAuth2 client library)
const crypto = require('crypto'); // Node.js crypto module

function base64URLEncode(str) {
    return str.toString('base64')
        .replace(/\+/g, '-')
        .replace(/\//g, '_')
        .replace(/=/g, '');
}

function sha256(buffer) {
    return crypto.createHash('sha256').update(buffer).digest();
}

async function generatePKCEPair() {
    const codeVerifier = base64URLEncode(crypto.randomBytes(32)); // 32 bytes = 256 bits
    const codeChallenge = base64URLEncode(sha256(Buffer.from(codeVerifier)));
    return { codeVerifier, codeChallenge };
}

// Client-side simulation
(async () => {
    const pkce = await generatePKCEPair();
    console.log('Generated Code Verifier:', pkce.codeVerifier);
    console.log('Generated Code Challenge:', pkce.codeChallenge);

    // Step 1: Client redirects user to Auth Server
    // const authUrl = `https://auth.example.com/oauth2/authorize?response_type=code&client_id=myclientid&redirect_uri=https://myclientapp.com/callback&scope=openid&state=xyz&code_challenge=${pkce.codeChallenge}&code_challenge_method=S256`;
    // window.location.href = authUrl;

    // --- User authenticates, gets redirected back with 'code' ---

    // Step 3: Client exchanges code for tokens
    // const authCode = "AUTH_CODE_FROM_REDIRECT";
    // const tokenRequestBody = new URLSearchParams({
    //     grant_type: 'authorization_code',
    //     code: authCode,
    //     redirect_uri: 'https://myclientapp.com/callback',
    //     client_id: 'myclientid',
    //     code_verifier: pkce.codeVerifier // Crucial for PKCE
    // });
    //
    // const response = await fetch('https://auth.example.com/oauth2/token', {
    //     method: 'POST',
    //     headers: { 'Content-Type': 'application/x-www-form-urlencoded' },
    //     body: tokenRequestBody.toString()
    // });
    // const tokens = await response.json();
    // console.log('Received Tokens:', tokens);
})();
Mechanism 4: CSRF Token Mechanics
Problem Solved: How to protect a web application from Cross-Site Request Forgery (CSRF) attacks, where an attacker tricks a logged-in user’s browser into sending an unintended request to a vulnerable web application?
Internal Mechanics: CSRF tokens (also known as anti-CSRF tokens or synchronizer tokens) are secret, unique, and unpredictable values generated by the server and included in state-changing requests (e.g., POST, PUT, DELETE). The server verifies this token on incoming requests.
How it Works:
Token Generation:
- When a user requests a form or a page that requires sensitive actions, the server generates a unique, cryptographically strong random token.
- This token is associated with the user’s session (e.g., stored in the server-side session, or embedded in a JWT).
Token Inclusion in Form/Request:
- The server embeds this token into the form as a hidden field.
- For AJAX requests (e.g., Single-Page Applications), the server sends the token to the client (e.g., in a cookie or as part of the initial page load). The client-side JavaScript then includes this token in a custom HTTP header (e.g.,
X-CSRF-Token) for all subsequent requests.
<!-- Example for a form submission -->
<form action="/transfer-money" method="POST">
    <input type="hidden" name="_csrf" value="GENERATED_CSRF_TOKEN_ABC">
    <input type="text" name="amount">
    <button type="submit">Transfer</button>
</form>
// Example for an AJAX request const csrfToken = "GENERATED_CSRF_TOKEN_ABC"; // obtained from a cookie or meta tag fetch('/api/profile/update', { method: 'POST', headers: { 'Content-Type': 'application/json', 'X-CSRF-Token': csrfToken // Custom header }, body: JSON.stringify({ name: 'New Name' }) });Token Validation:
- When the server receives a state-changing request (e.g., a POST to
/transfer-money), it extracts the CSRF token from the request (from the hidden field or custom header). - It then compares this received token with the token associated with the user’s session on the server side.
- If the tokens match, the request is legitimate.
- If they do not match, the request is rejected as a potential CSRF attack.
- When the server receives a state-changing request (e.g., a POST to
Why it Works: An attacker’s malicious website cannot read the CSRF token from the legitimate application’s page (due to Same-Origin Policy) or set custom headers (due to CORS preflight checks). Therefore, the attacker cannot include the correct, matching token in their forged request, causing the server’s validation to fail.
Complementary Defenses:
- SameSite Cookies:
SameSite=LaxorStrictcookies provide a strong first line of defense against CSRF by preventing the browser from sending cookies with cross-site requests. ForSameSite=None(often needed for cross-site SSO), CSRF tokens become critical. - Referer Header Check: While not foolproof, checking the
Refererheader to ensure the request originated from a trusted domain can add another layer.
Code Example (Conceptual Server-Side CSRF Middleware):
// Express.js-like conceptual middleware for CSRF protection

// In a real app, use a library like 'csurf' or 'express-session' + 'cookie-parser'
const crypto = require('crypto');

function generateCsrfToken(req, res) {
    if (!req.session.csrfSecret) {
        req.session.csrfSecret = crypto.randomBytes(16).toString('hex');
    }
    // Generate a token based on the secret, and potentially a session ID
    // This is a simplified example; real implementations involve more complexity.
    return req.session.csrfSecret; // Simple for illustration. A better token would be HMAC(session_id, secret)
}

function csrfProtectionMiddleware(req, res, next) {
    if (req.method === 'GET' || req.method === 'HEAD' || req.method === 'OPTIONS') {
        return next(); // GET requests typically don't need CSRF protection
    }

    const clientToken = req.body._csrf || req.headers['x-csrf-token'];
    const serverToken = req.session.csrfSecret; // Or retrieve from JWT claims

    if (!clientToken || clientToken !== serverToken) {
        console.warn('CSRF token mismatch or missing. Potential CSRF attack.');
        return res.status(403).send('CSRF token invalid');
    }

    next();
}

// Usage in an application:
// app.use(sessionMiddleware); // Needs a session middleware to store csrfSecret
// app.use(csrfProtectionMiddleware);
//
// app.get('/protected-form', (req, res) => {
//     const csrfToken = generateCsrfToken(req, res);
//     res.send(`<form method="POST" action="/protected-action"><input type="hidden" name="_csrf" value="${csrfToken}"><button type="submit">Do Action</button></form>`);
// });
//
// app.post('/protected-action', (req, res) => {
//     res.send('Action performed successfully!');
// });
Hands-On Example: Building a Mini Version
Let’s build a simplified token-based authentication system in JavaScript (Node.js) to demonstrate the core concepts of JWT issuance and verification, along with a basic refresh token mechanism. This example will focus on the server-side logic.
// mini-auth-server.js

const express = require('express');
const jwt = require('jsonwebtoken');
const bcrypt = require('bcrypt'); // For password hashing
const crypto = require('crypto'); // For refresh token generation

const app = express();
const PORT = 3000;

app.use(express.json()); // For parsing JSON request bodies

// --- Configuration ---
const ACCESS_TOKEN_SECRET = crypto.randomBytes(64).toString('hex'); // Keep secret!
const REFRESH_TOKEN_SECRET = crypto.randomBytes(64).toString('hex'); // Keep secret!
const ACCESS_TOKEN_EXPIRY = '15m'; // Access tokens are short-lived
const REFRESH_TOKEN_EXPIRY = '7d';  // Refresh tokens are longer-lived

// In a real app, these would be in a database
const users = [
    { id: 1, username: 'user1', passwordHash: '' }, // Password for user1: "password123"
    { id: 2, username: 'admin', passwordHash: '' }   // Password for admin: "adminpass"
];

// Hash initial passwords (run once)
(async () => {
    users[0].passwordHash = await bcrypt.hash('password123', 10);
    users[1].passwordHash = await bcrypt.hash('adminpass', 10);
    console.log('User passwords hashed.');
})();

// A simple in-memory store for refresh tokens (in a real app, use a database like Redis)
const refreshTokensStore = new Set();

// --- Helper Functions ---

function generateAccessToken(user) {
    return jwt.sign({ userId: user.id, username: user.username }, ACCESS_TOKEN_SECRET, { expiresIn: ACCESS_TOKEN_EXPIRY });
}

function generateRefreshToken(user) {
    const token = jwt.sign({ userId: user.id, username: user.username }, REFRESH_TOKEN_SECRET, { expiresIn: REFRESH_TOKEN_EXPIRY });
    refreshTokensStore.add(token); // Store for revocation/rotation
    return token;
}

// --- Middleware for Access Token Validation ---
function authenticateToken(req, res, next) {
    const authHeader = req.headers['authorization'];
    const token = authHeader && authHeader.split(' ')[1]; // Bearer TOKEN

    if (token == null) return res.sendStatus(401); // No token

    jwt.verify(token, ACCESS_TOKEN_SECRET, (err, user) => {
        if (err) {
            console.error("Access token verification failed:", err.message);
            return res.sendStatus(403); // Token invalid or expired
        }
        req.user = user; // Attach user payload to request
        next();
    });
}

// --- Routes ---

// 1. User Login - Issues Access and Refresh Tokens
app.post('/login', async (req, res) => {
    const { username, password } = req.body;
    const user = users.find(u => u.username === username);

    if (!user) {
        return res.status(400).send('Invalid credentials');
    }

    const passwordMatch = await bcrypt.compare(password, user.passwordHash);
    if (!passwordMatch) {
        return res.status(400).send('Invalid credentials');
    }

    const accessToken = generateAccessToken(user);
    const refreshToken = generateRefreshToken(user);

    // In a real app, set refreshToken as HttpOnly, Secure, SameSite cookie
    // res.cookie('refreshToken', refreshToken, { httpOnly: true, secure: true, sameSite: 'strict', maxAge: 7 * 24 * 60 * 60 * 1000 });
    res.json({ accessToken, refreshToken });
});

// 2. Refresh Token Endpoint - Issues new Access Token (and new Refresh Token for rotation)
app.post('/token', (req, res) => {
    const { refreshToken } = req.body;

    if (refreshToken == null) return res.sendStatus(401);

    // Check if refresh token is known/valid (e.g., in database)
    if (!refreshTokensStore.has(refreshToken)) {
        return res.sendStatus(403); // Refresh token not found or revoked
    }

    jwt.verify(refreshToken, REFRESH_TOKEN_SECRET, (err, user) => {
        if (err) {
            console.error("Refresh token verification failed:", err.message);
            // If refresh token is invalid/expired, remove it from store
            refreshTokensStore.delete(refreshToken);
            return res.sendStatus(403);
        }

        // Token Rotation: Invalidate old refresh token, issue new ones
        refreshTokensStore.delete(refreshToken); // Invalidate old token
        const newAccessToken = generateAccessToken(user);
        const newRefreshToken = generateRefreshToken(user); // Issue new refresh token

        res.json({ accessToken: newAccessToken, refreshToken: newRefreshToken });
    });
});

// 3. Logout - Revokes Refresh Token
app.post('/logout', (req, res) => {
    const { refreshToken } = req.body;
    if (refreshToken) {
        refreshTokensStore.delete(refreshToken); // Remove from store
    }
    // In a real app, clear refresh token cookie from client
    // res.clearCookie('refreshToken');
    res.sendStatus(204); // No Content
});

// 4. Protected Route - Requires Access Token
app.get('/protected', authenticateToken, (req, res) => {
    res.json({ message: `Welcome, ${req.user.username}! You accessed a protected resource.`, userId: req.user.userId });
});

app.listen(PORT, () => console.log(`Auth server running on port ${PORT}`));

// To run this:
// 1. npm init -y
// 2. npm install express jsonwebtoken bcrypt
// 3. node mini-auth-server.js

// --- Example Usage (using curl or Postman) ---

// 1. Login
// curl -X POST -H "Content-Type: application/json" -d '{"username": "user1", "password": "password123"}' http://localhost:3000/login
// Response will give you accessToken and refreshToken

// 2. Access Protected Resource (with valid accessToken)
// curl -H "Authorization: Bearer YOUR_ACCESS_TOKEN" http://localhost:3000/protected

// 3. Refresh Token (when accessToken expires)
// curl -X POST -H "Content-Type: application/json" -d '{"refreshToken": "YOUR_REFRESH_TOKEN"}' http://localhost:3000/token
// Response will give you a new accessToken and a new refreshToken

// 4. Logout
// curl -X POST -H "Content-Type: application/json" -d '{"refreshToken": "YOUR_REFRESH_TOKEN"}' http://localhost:3000/logout
Walkthrough:
- Configuration: We define secrets for signing JWTs and set expiry times.
usersarray simulates a user database with hashed passwords.refreshTokensStoreis a simpleSetto track active refresh tokens for revocation and rotation. generateAccessTokenandgenerateRefreshToken: These functions usejsonwebtokento create signed JWTs. Access tokens have a shortexpiresIn, while refresh tokens have a longer one. Refresh tokens are added torefreshTokensStore.authenticateTokenMiddleware: This is the core authorization logic for protected routes. It extracts the Access Token from theAuthorizationheader, verifies its signature and expiry usingjwt.verify, and attaches the decoded user payload to the request if valid./loginEndpoint:- Takes
usernameandpassword. - Compares the password against the stored
passwordHashusingbcrypt.compare. - If valid, it calls
generateAccessTokenandgenerateRefreshTokenand sends them back.
- Takes
/tokenEndpoint:- This is the refresh endpoint. It expects a
refreshTokenin the body. - It checks if the
refreshTokenexists inrefreshTokensStore(for revocation). - It verifies the
refreshToken’s signature and expiry usingjwt.verifywith theREFRESH_TOKEN_SECRET. - Token Rotation: If valid, it deletes the old
refreshTokenfromrefreshTokensStoreand issues newaccessTokenandrefreshTokens, demonstrating token rotation.
- This is the refresh endpoint. It expects a
/logoutEndpoint: Simply removes therefreshTokenfromrefreshTokensStore, effectively revoking it./protectedEndpoint: This route uses theauthenticateTokenmiddleware, meaning only requests with a valid, unexpired Access Token will reach its handler.
This mini-version illustrates how short-lived access tokens and long-lived, revocable refresh tokens work together to provide secure and persistent authentication.
Real-World Project Example
Consider a modern e-commerce platform with a Single-Page Application (SPA) frontend (e.g., React, Vue, Angular) and a microservices-based backend (e.g., Node.js APIs, Java Spring Boot services).
Scenario: User logs in, browses products, adds items to cart, and makes a purchase.
Architecture:
Detailed Flow:
- User Initiates Login: User clicks “Login” in the SPA. The SPA initiates an OpenID Connect Authorization Code flow with PKCE by redirecting the user to the
AuthZ Server(e.g., Okta, Auth0, Keycloak, or a custom IdP). - User Authentication: The
AuthZ Serverdisplays its login page. User enters credentials, which are verified against theUser Databaseusing Argon2-hashed passwords and brute-force protection. MFA might be prompted. - Token Issuance: Upon successful authentication, the
AuthZ Serverissues an Authorization Code and redirects the user back to the SPA’s registeredredirect_uri. - Token Exchange: The SPA’s backend (if it’s a confidential client) or the SPA itself (if public client with PKCE) exchanges the Authorization Code for an
Access Token(JWT),ID Token(JWT), andRefresh Tokenat theAuthZ Server’s Token Endpoint. - Secure Token Storage:
- The
Refresh Tokenis stored in anHttpOnly,Secure,SameSite=Laxcookie. This cookie is scoped to the AuthZ Server’s domain or a dedicated token refresh endpoint to prevent direct access by the SPA JavaScript. - The
Access TokenandID Tokenare stored in the SPA’s in-memory state. This protects them from XSS attacks that targetlocalStorage. When the page refreshes, the SPA will use theRefresh Token(via its backend or a dedicated refresh endpoint) to get new tokens.
- The
- Accessing Protected APIs:
- The SPA needs to fetch product data. It retrieves the
Access Tokenfrom its in-memory state. - It makes an API request to
https://api.ecommerce.com/productsvia theAPI Gateway, including theAccess Tokenin theAuthorization: Bearerheader.
- The SPA needs to fetch product data. It retrieves the
- API Gateway Validation:
- The
API Gateway(e.g., Nginx, Envoy, AWS API Gateway) intercepts the request. - It validates the
Access Token(JWT) by verifying its signature against theAuthZ Server’s public key (retrieved from its JWKS endpoint), checkingexp,aud,issclaims. This validation might involve a call to theAuthZ Serveror be done locally if the JWKS is cached. - It performs basic authorization checks based on token scopes/claims (e.g., “does this token have
product.readscope?”).
- The
- Request Routing: If the token is valid and authorized, the
API Gatewayforwards the request to the appropriate backendMicroservice(e.g.,Product Microservice). - Microservice Authorization: The
Product Microservicereceives the request. It might perform more granular authorization checks based on theuserIdand roles extracted from the Access Token (which the API Gateway might have passed in a header). It then fetches data from theProduct Database. - Token Refresh: If the
Access Tokenexpires during the session, the SPA detects this (e.g., by a401response from the API Gateway).- The SPA (or a dedicated backend component) makes a request to a refresh endpoint, which uses the
Refresh Tokenfrom theHttpOnlycookie to get a newAccess Token(and a newRefresh Tokenif rotation is enabled) from theAuthZ Server. - The new tokens are then stored, and the original API request is retried.
- The SPA (or a dedicated backend component) makes a request to a refresh endpoint, which uses the
- Single Sign-On (SSO): If the user later accesses another application that uses the same
AuthZ Server, they will be automatically logged in without re-entering credentials because theAuthZ Serverhas a valid session cookie for the user. - Zero-Trust Principles: Throughout this, the
API Gatewayacts as a Policy Enforcement Point. It continuously verifies identity, device context (if integrated), and authorization for every API call, even internal ones if microservices are configured for mTLS. Resource microservices only trust requests that have passed through the gateway and have valid, verified tokens.
This architecture showcases the integration of OAuth2/OIDC, JWTs, secure token storage, token rotation, API Gateway for centralized security, and the underlying principles of Zero-Trust.
Performance & Optimization
Authentication and security systems, while critical, can introduce latency and computational overhead. Optimizations are crucial for a smooth user experience and scalable backend.
- JWT Verification Caching:
- Optimization: Public keys (JWKS) used to verify JWT signatures can be cached by resource servers or API gateways. This avoids fetching them from the Auth Server for every token validation.
- Trade-off: Cache invalidation strategy is needed if keys are rotated. A short cache TTL (e.g., 5-10 minutes) balances performance and key rotation agility.
- Stateless Resource Servers:
- Optimization: JWTs are self-contained. Resource servers can validate them without needing to query a central Auth Server or database for every request, reducing network latency and database load.
- Trade-off: Revoking individual JWTs before expiry is harder; requires a distributed revocation list or “blacklist” check, which reintroduces state. For most cases, short Access Token lifetimes are preferred over complex revocation.
- Efficient Hashing Algorithms:
- Optimization: While password hashing (Argon2, bcrypt) is intentionally slow, it’s typically only done once per login. Ensure the work factors (
m,t,pfor Argon2) are tuned to be sufficiently strong but not excessively slow (e.g., < 500ms on production hardware). - Trade-off: Stronger hashing means slower verification. Balance security requirements with user experience. Regularly review and increase work factors as computing power improves.
- Optimization: While password hashing (Argon2, bcrypt) is intentionally slow, it’s typically only done once per login. Ensure the work factors (
- API Gateway Offloading:
- Optimization: Centralize token validation, rate limiting, and basic authorization at an API Gateway. This offloads these tasks from individual microservices, reducing boilerplate and ensuring consistent security.
- Trade-off: The API Gateway becomes a single point of failure and a performance bottleneck if not scaled properly.
- Refresh Token Lifetimes:
- Optimization: A longer refresh token lifetime reduces the frequency of users needing to re-authenticate, improving UX.
- Trade-off: Longer lifetime means a higher impact if a refresh token is compromised. Token rotation mitigates this risk significantly.
- Database/Cache for Refresh Tokens & Sessions:
- Optimization: Use highly performant, in-memory databases like Redis for storing refresh tokens or server-side session data. This offers low-latency lookups for revocation and session management.
- Trade-off: Introduces another dependency and requires careful management of data persistence and replication for high availability.
- mTLS Performance:
- Optimization: mTLS handshakes can be computationally intensive, especially for many short-lived connections. Keep-alive connections and session resumption can mitigate this overhead.
- Trade-off: Increased CPU usage on both client and server for cryptographic operations.
Benchmarks (Conceptual):
- JWT Verification: On a modern server, a single JWT signature verification (RS256) can take microseconds. Validating claims adds minimal overhead.
- Password Hashing (Argon2id): A typical Argon2id hash with
m=65536, t=3, p=4might take 200-400ms on a standard CPU. This is acceptable for a login operation. - API Gateway Throughput: A well-configured API Gateway can handle thousands to tens of thousands of requests per second, with JWT validation adding minimal latency (e.g., 1-5ms per request).
Common Misconceptions
- “JWTs are encrypted.”
- Clarification: JWTs are encoded (Base64Url) and signed, but not encrypted by default. Anyone can decode the header and payload of a JWT and read its contents. The signature only guarantees integrity (that it hasn’t been tampered with) and authenticity (who signed it). For confidential data, use JWE (JSON Web Encryption), which is a different standard, or encrypt specific claims within the JWT payload before signing.
- “Storing JWTs in
localStorageis fine for SPAs.”- Clarification: Storing Access Tokens (or any sensitive token) in
localStoragemakes them highly vulnerable to XSS attacks. If an attacker can inject malicious JavaScript into your page, they can easily readlocalStorageand steal the token.HttpOnlycookies are preferred for web applications as JavaScript cannot access them.
- Clarification: Storing Access Tokens (or any sensitive token) in
- “Refresh Tokens should also be short-lived.”
- Clarification: Access Tokens should be short-lived (minutes to an hour). Refresh Tokens are designed to be long-lived (days, weeks, months) to allow users to maintain sessions without frequent re-authentication. The security of refresh tokens relies on them being stored very securely (e.g.,
HttpOnly,Secure,SameSitecookies, OS secure storage) and implementing token rotation and revocation.
- Clarification: Access Tokens should be short-lived (minutes to an hour). Refresh Tokens are designed to be long-lived (days, weeks, months) to allow users to maintain sessions without frequent re-authentication. The security of refresh tokens relies on them being stored very securely (e.g.,
- “API keys are a form of user authentication.”
- Clarification: API keys are typically used for application identification or machine-to-machine authentication, not for authenticating individual end-users. They are static secrets that identify the calling application/service and grant it certain permissions. They lack the dynamic, user-centric features of OAuth2/OIDC (consent, scopes per user, refresh tokens, explicit logout). Using API keys for user authentication is insecure and lacks flexibility.
- “OAuth2 is an authentication protocol.”
- Clarification: OAuth2 is primarily an authorization framework. It’s about granting a client application permission to access protected resources on behalf of a user. It defines how to get an access token. OpenID Connect (OIDC) builds on top of OAuth2 to add an authentication layer, providing identity information about the authenticated user via the ID Token. So, OAuth2 + OIDC = authentication and authorization.
- “Passwords should be hashed with MD5 or SHA1.”
- Clarification: MD5 and SHA1 are cryptographically broken for hashing passwords. They are too fast and vulnerable to collision and brute-force attacks. Modern, memory-hard, and slow algorithms like Argon2 (recommended), bcrypt, or scrypt must be used.
- “HTTPS alone is enough to prevent web security attacks.”
- Clarification: HTTPS protects data in transit from eavesdropping and tampering. It’s foundational. However, it does not protect against application-level attacks like XSS (if tokens are in
localStorage), CSRF (if no anti-CSRF tokens orSameSitecookies), SQL injection, business logic flaws, or weak authentication. A multi-layered defense-in-depth approach is always necessary.
- Clarification: HTTPS protects data in transit from eavesdropping and tampering. It’s foundational. However, it does not protect against application-level attacks like XSS (if tokens are in
Advanced Topics
- WebAuthn / FIDO2:
- Concept: A modern, phishing-resistant, and passwordless authentication standard. It uses asymmetric cryptography and hardware security keys (e.g., USB keys, biometric sensors) to authenticate users.
- How it works: During registration, the user’s device generates a unique public/private key pair. The public key is registered with the server. During login, the server sends a challenge, and the device uses its private key to sign the challenge, verifying the user’s presence (e.g., via touch, PIN, fingerprint). The server verifies the signature with the stored public key.
- Problem Solved: Eliminates passwords, highly resistant to phishing, credential stuffing, and replay attacks.
- Policy-Based Access Control (PBAC) / Attribute-Based Access Control (ABAC):
- Concept: A highly flexible authorization model where access decisions are made based on a set of attributes (e.g., user role, department, location, time of day, resource sensitivity, action being performed) rather than fixed roles (RBAC).
- How it works: Policies are written using a declarative language (e.g., OPA Rego, XACML). A Policy Decision Point (PDP) evaluates these policies against attributes provided in the request context. A Policy Enforcement Point (PEP) (e.g., API Gateway, microservice) then enforces the PDP’s decision.
- Problem Solved: Provides fine-grained, dynamic authorization that scales with complex business logic and changing requirements.
- Distributed Tracing for Authentication Flows:
- Concept: In microservice architectures, an authentication request might span multiple services (client, auth server, API gateway, resource service). Distributed tracing (e.g., OpenTelemetry, Jaeger, Zipkin) allows tracking a single request’s journey across all these services.
- How it works: A unique trace ID is generated at the start of a request and propagated through all subsequent service calls. Each service records spans (operations) with their timing and context, all linked by the trace ID.
- Problem Solved: Essential for debugging latency issues, understanding complex authentication flows, and identifying security bottlenecks or failures in a distributed system.
- Client Certificate Authentication (Beyond mTLS):
- Concept: While mTLS provides mutual authentication at the TLS layer, client certificates can also be used as a primary authentication factor for human users, especially in high-security environments.
- How it works: The user possesses a client certificate (e.g., on a smart card, YubiKey). During login, the browser presents this certificate to the web server. The server verifies the certificate’s validity and trusts the issuing CA. The
subjectorsubjectAltNameof the certificate can then be used to identify the user. - Problem Solved: Strong, phishing-resistant authentication, often used in government or enterprise settings. Can be combined with other factors.
Comparison with Alternatives
Server-Side Sessions vs. Token-Based Authentication (JWTs)
| Feature | Server-Side Sessions (e.g., Express-Session) | Token-Based (JWTs) |
|---|---|---|
| State Management | Stateful: Server stores session data. Client gets ID. | Stateless: Session data in token. Server verifies. |
| Scalability | Requires sticky sessions or distributed session store. | Highly scalable horizontally. Each server validates. |
| Cross-Domain | Challenging for multi-domain apps. CORS issues. | Easier for cross-domain access (e.g., APIs). |
| Mobile Apps | Less suitable. Cookies not native. | Native for mobile APIs. |
| CSRF Protection | Inherent with HttpOnly, SameSite cookies + anti-CSRF tokens. | Requires careful HttpOnly cookie usage + anti-CSRF or SameSite. |
| XSS Protection | HttpOnly cookies protect session ID. | If tokens in localStorage, highly vulnerable. HttpOnly cookies protect. |
| Revocation | Easy: Delete session from server. | Harder: Requires blacklist/short expiry. |
| Overhead | Database/cache lookups for each request. | CPU for token verification. |
| Use Case | Traditional web apps, strict session control. | SPAs, mobile apps, microservices, APIs. |
Different SSO Protocols (SAML vs. OpenID Connect)
| Feature | SAML (Security Assertion Markup Language) | OpenID Connect (OIDC) |
|---|---|---|
| Basis | XML-based. Older. | JSON/JWT-based. Built on OAuth2. |
| Complexity | More complex to implement and debug. | Simpler, more developer-friendly. |
| Data Format | XML documents. | JSON Web Tokens (JWTs) for identity (ID Token). |
| Primary Use | Enterprise SSO (federated identity), B2B integrations. | Web, mobile, SPAs, APIs. Consumer-facing apps. |
| Flows | Browser POST/Redirect Bindings. | OAuth2 Authorization Code, Implicit, Hybrid Flows. |
| Flexibility | Less flexible for non-browser clients. | Highly flexible for various client types. |
| Standardization | Widely adopted in enterprise. | Rapidly gaining adoption, modern standard. |
| Learning Curve | Steeper for developers. | Easier for developers familiar with OAuth2/REST. |
Debugging & Inspection Tools
Understanding the internal workings is greatly aided by tools that allow you to inspect the runtime behavior of authentication systems.
- Browser Developer Tools:
- Network Tab: Inspect all HTTP requests and responses. Look for
Authorizationheaders (Access Tokens),Set-Cookieheaders (session IDs, refresh tokens,SameSiteattributes), and redirects. - Application Tab:
- Cookies: View all cookies, their
HttpOnly,Secure,SameSite, andExpiresattributes. - Local Storage/Session Storage: Check for any sensitive data stored there (ideally none).
- Cookies: View all cookies, their
- Network Tab: Inspect all HTTP requests and responses. Look for
- JWT Debuggers:
- Online tools like
jwt.ioallow you to paste a JWT and decode its header and payload. It also verifies the signature if you provide the secret or public key. This is invaluable for understanding token contents and quickly identifying issues like incorrect claims or expired tokens.
- Online tools like
- OpenSSL (for mTLS):
- When dealing with mTLS,
opensslis crucial for inspecting certificates, verifying trust chains, and debugging TLS handshakes. openssl s_client -connect host:port -showcerts -debugcan help diagnose certificate issues.
- When dealing with mTLS,
- API Clients (Postman, Insomnia, curl):
- These tools allow you to craft and send custom HTTP requests, including
Authorizationheaders,X-CSRF-Tokenheaders, and specific cookie values. Essential for testing API endpoints and token flows.
- These tools allow you to craft and send custom HTTP requests, including
- Server-Side Logs:
- Comprehensive logging on your Auth Server, API Gateway, and resource servers is vital. Log token issuance, validation failures, authentication attempts (success/failure), brute-force triggers, and authorization decisions.
- Ensure logs are properly secured and don’t contain sensitive information (like raw passwords or full tokens).
- Distributed Tracing Systems (Jaeger, Zipkin, OpenTelemetry):
- For complex microservice architectures, these tools help visualize the flow of a request across multiple services. You can see where delays occur, which services are called, and potential points of failure in the authentication and authorization chain.
- Security Scanners (OWASP ZAP, Burp Suite):
- These proxy tools can intercept and modify requests, allowing you to test for vulnerabilities like CSRF by stripping tokens, or XSS by injecting malicious scripts. They also have automated scanners for common web vulnerabilities.
Key Takeaways
- Authentication vs. Authorization: Authentication is “who you are”; Authorization is “what you can do.” Modern systems separate these concerns but often coordinate them.
- Tokens are Central: JWTs are the workhorse for stateless authentication and authorization in distributed systems, but they are signed, not encrypted.
- Secure Token Storage is Paramount: For web apps,
HttpOnly,Secure,SameSitecookies are the gold standard for Refresh Tokens and often Access Tokens (if not in-memory). AvoidlocalStoragefor sensitive tokens due to XSS risk. - Refresh Tokens Enable Long Sessions: Use short-lived Access Tokens for resource access and long-lived, rotating Refresh Tokens to maintain user sessions without re-authentication.
- PKCE is Non-Negotiable for Public Clients: Always use PKCE with OAuth2 Authorization Code Flow for SPAs and mobile apps to prevent authorization code interception.
- Defense in Depth is Critical: Combine multiple security measures: strong password hashing (Argon2), brute-force protection, CAPTCHAs, MFA, CSRF tokens,
SameSitecookies, HTTPS, and proper token validation. - Zero-Trust is the Future: Assume no implicit trust. Verify every request, continuously, based on identity, device, and context, regardless of network location.
- Understand Internal Mechanics: Knowing
howJWTs are signed,howArgon2 hashes, orhowOAuth2 flows work allows you to diagnose issues, design robust systems, and identify vulnerabilities effectively. - Stay Updated: The security landscape evolves rapidly. Regularly review best practices, new standards (e.g., WebAuthn), and emerging threats.
References
- OAuth 2.0 Authorization Framework RFC 6749
- OpenID Connect Core 1.0
- JSON Web Token (JWT) RFC 7519
- Proof Key for Code Exchange by OAuth Public Clients (PKCE) RFC 7636
- Argon2: The Memory-Hard Password Hashing Function
- OWASP Top 10 Web Application Security Risks
- NIST Special Publication 800-207: Zero Trust Architecture
- WebAuthn: W3C Web Authentication Standard
- SameSite Cookies Explained
Transparency Note
This guide was created by an AI Expert to provide a comprehensive and up-to-date technical explanation of authentication and security systems as of March 2026. While significant effort has been made to ensure accuracy and cover best practices, the field of cybersecurity is constantly evolving. Readers are encouraged to consult official specifications, security advisories, and industry experts for specific implementations and critical security decisions.